But that's a way off. In the meantime, I wanted to document a project from beginning to the end. It's my third blanket and a gift for my new nephew when he arrives in June. If you're a quilter and you see any mistakes, please let me know! I'm still learning and I need all the help I can get.

Aren't they pretty? All batiks, which are so nice to work with and are works of art in themselves. Mary at Tangled Threads here in Peterborough spent a good hour with me choosing the colours. She and all her staff are so patient and helpful with newbies! I think she did a pretty good job here.
So step one was to wash and dry all the fabrics.

Then comes the pressing. I've learned the hard way that there's a distinct difference between ironing and pressing. Pressing- the right way- takes much longer. Gotta do both sides, too.

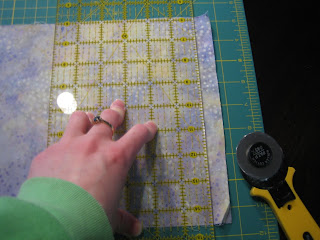
Cutting off the selvages:

Then cutting the strips:

Until there's two strips of each:

Then sew them together. I have them numbered to keep them in order.

Once they're all pieced together and the seams are properly pressed, it looks like this:

Now's here's where the "bargello" bit comes in. It's a unique way of creating a flowing wavy pattern. I sewed the first strip to the last, making a strippy tube.

Then more strips are cut perpendicularly to the first ones.

The trick now is to pick apart the seams at specific places to make the pattern. It doesn't take as long as you'd think.

Next, sew those together. Mango "helped" me with that part.

Up until this point, it was smooth sailing. The I realized that I pressed some seams the wrong way and they weren't going to nest together properly. They're supposed to point in opposite directions, but they didn't. See:

It was a pain to go back and re-press, but it was necessary. Finally, the pattern emerged:

And I added on some borders:

I was pretty happy with the corners.

I chose a heart-shaped meander pattern for the quilting. I found out later it was a bit of an ambitious undertaking for a newbie. It took 2 hours to trace on. I used a yellow pencil...big mistake. It never washed out completely later.

Then the top is layered with the batting and some flannel for the back. Unfortunately, I chose to pin it on top of my freshly-refinished table and I gouged the finish. I couldn't take a picture. Too traumatic.

Next I set up my brand new to me borrowed Husqvarna machine to do the quilting. I practiced a bit since there's a knack to it.

Now the biggest pisser of this project:

The damn thread broke again and again and again. I fiddled with the machine for a whole evening and was ready to pitch it through my living room window. In the end, I was so flustered while practicing that I let my hand slip under the needle and it went right through my finger. I have a picture but trust me, you don't want to see it. More blood than you'd think. Gah.
I had to walk away for three days and cool off and let the finger heal up. In the meantime, I got some advice to change the thread, which reduced the breakage from every 15 seconds to every 10 minutes. I was willing to live with that.

But it was still a piss-off.
Keeping my fingers well away from the pointy bits:

It took a whole afternoon, but the quilting was done. Am I totally happy? Course not. But it'll do.
Squaring off the edges:

Then sewing on the French binding:

I flipped over the binding and hand sewed it to the back. Done! All together, it's about 10 or 11 hours of work, not including screwing around time dealing with the thread issue. Despite that, it was a fun project and the time just flew by. I'm already planning the next one!


